


Egoscue Excercises
5 additions to document , most recent almost 9 years ago
| When | Why |
|---|---|
| Sep-28-16 | more |
| Sep-28-16 | more |
| Sep-29-16 | more |
| Sep-30-16 | more |
| Oct-01-16 | more |
18 changes, most recent almost 4 years ago
|
|
|
2
Paragraph 2 changes
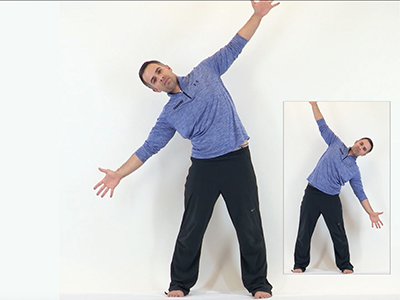
Static Extension Position (2 minutes)
|
|
|
How to Perform this E-cise™
|
What this E-cise™ doesThis exercise promotes lumbar and thoracic extension through bilateral hip demand. |

Added September 28, 2016 at 4:16pm
by Dan Doernberg
Title: more
Paragraph 16 changes
![]() Static Back (5 minutes)
Static Back (5 minutes)
How to Perform this E-cise™
|
||
What this E-cise™ does
This exercise creates horizontal load between shoulder and pelvis, which contributes to thoracic extension by engaging the stabilizers and flexors of the hip. This position helps prevent compensation from occurring while performing other types of muscular work.
24
Paragraph 24 changes
Static Back Knee Pillow Squeezes (skip)
|
|
|
How to Perform this E-cise™
29
Paragraph 29 changes
Place a pillow (something with some stiffness) between your knees (about 6 inches apart).
31
Paragraph 31 changes
Relax your upper back and shoulders.
32
Paragraph 32 changes
Squeeze Gently squeeze your knees (inner thigh muscles) into the pillow, then release. Try not to contract your stomach/abdominal muscles while squeezing.
|
Added September 28, 2016 at 6:01pm
by Dan Doernberg
Title: more
|
|||||||
How to Perform this E-cise™
38
Paragraph 38 changes
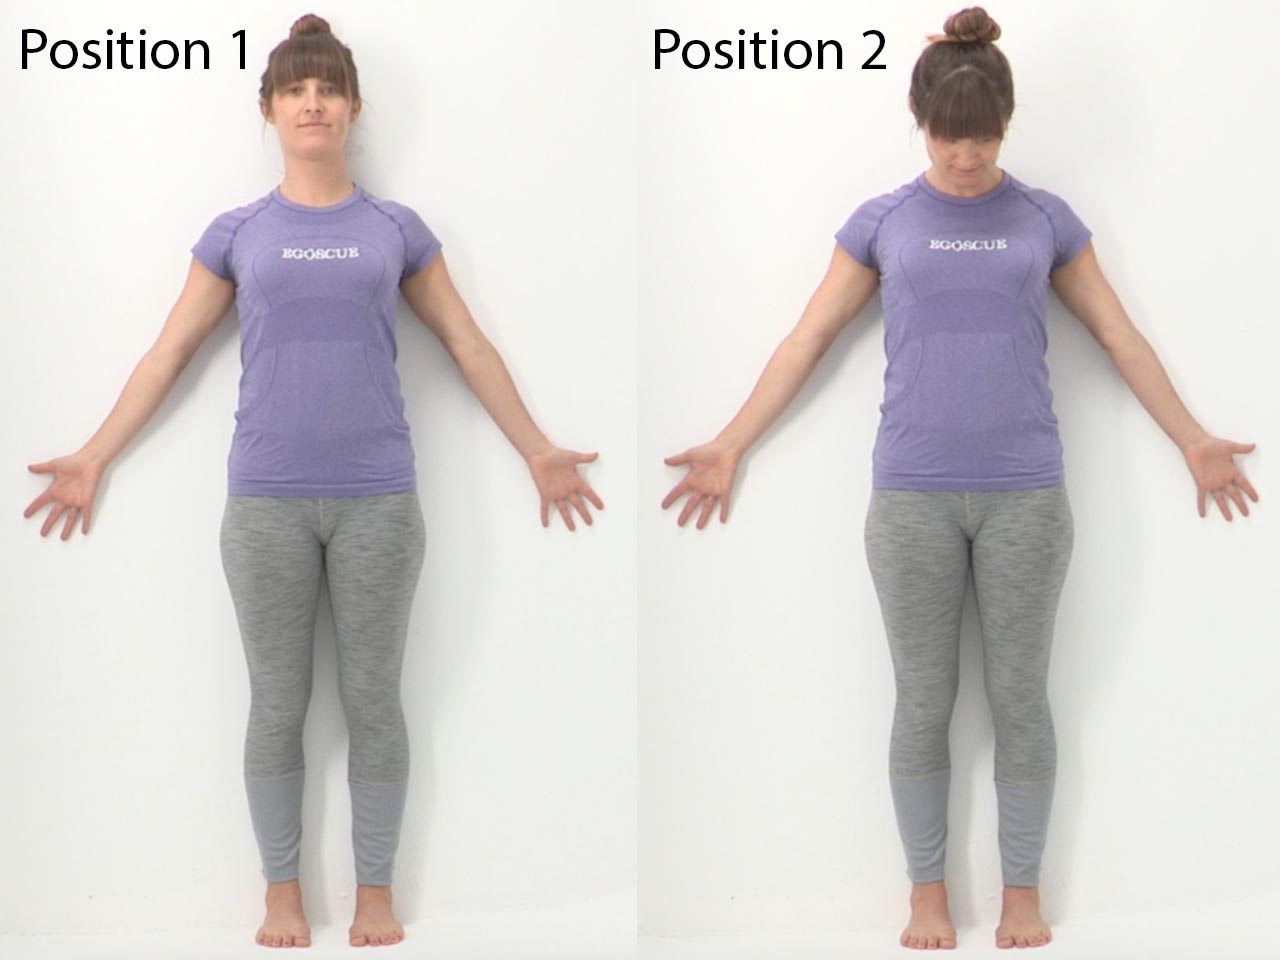
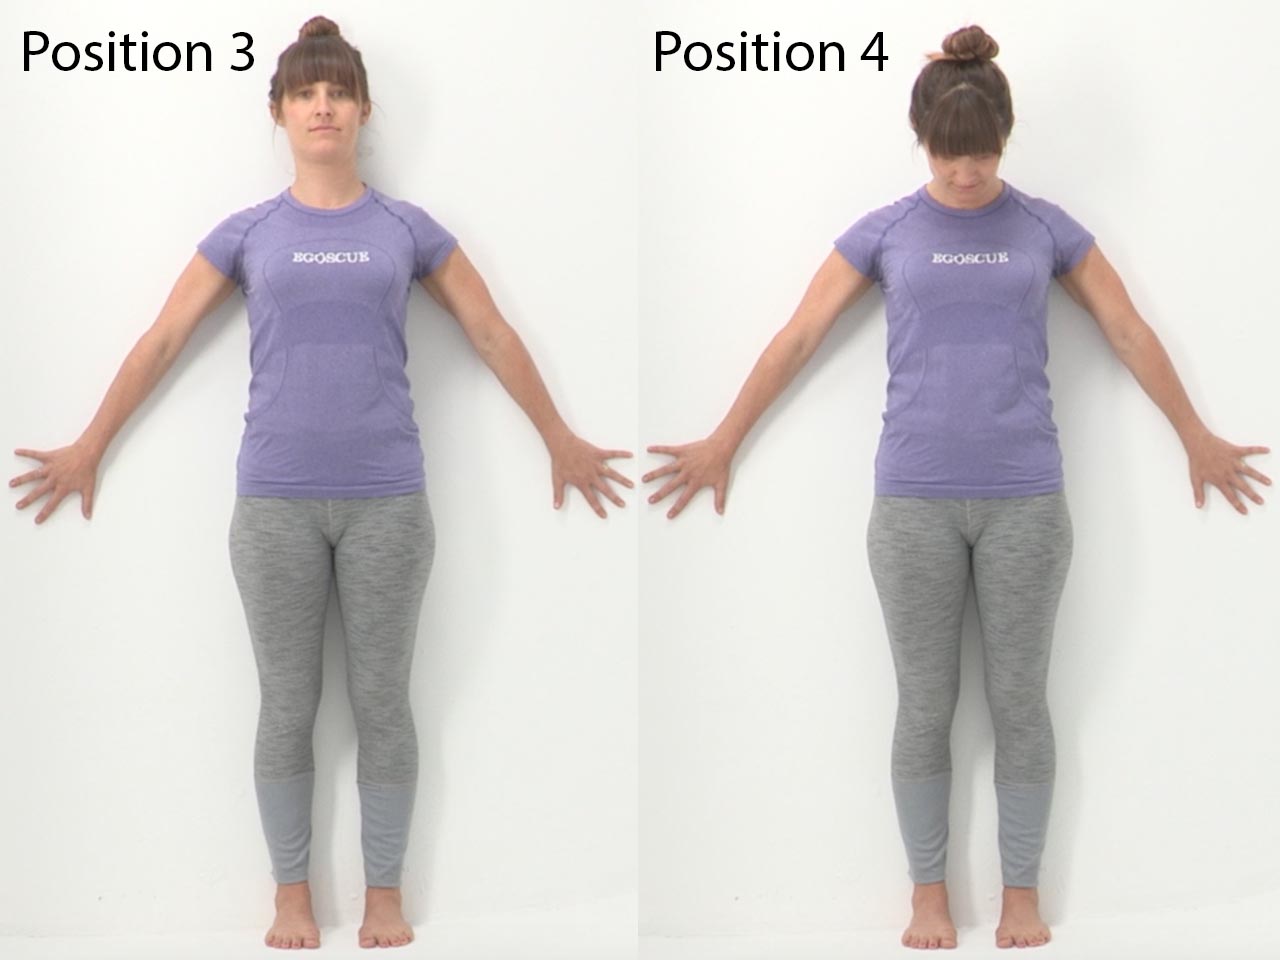
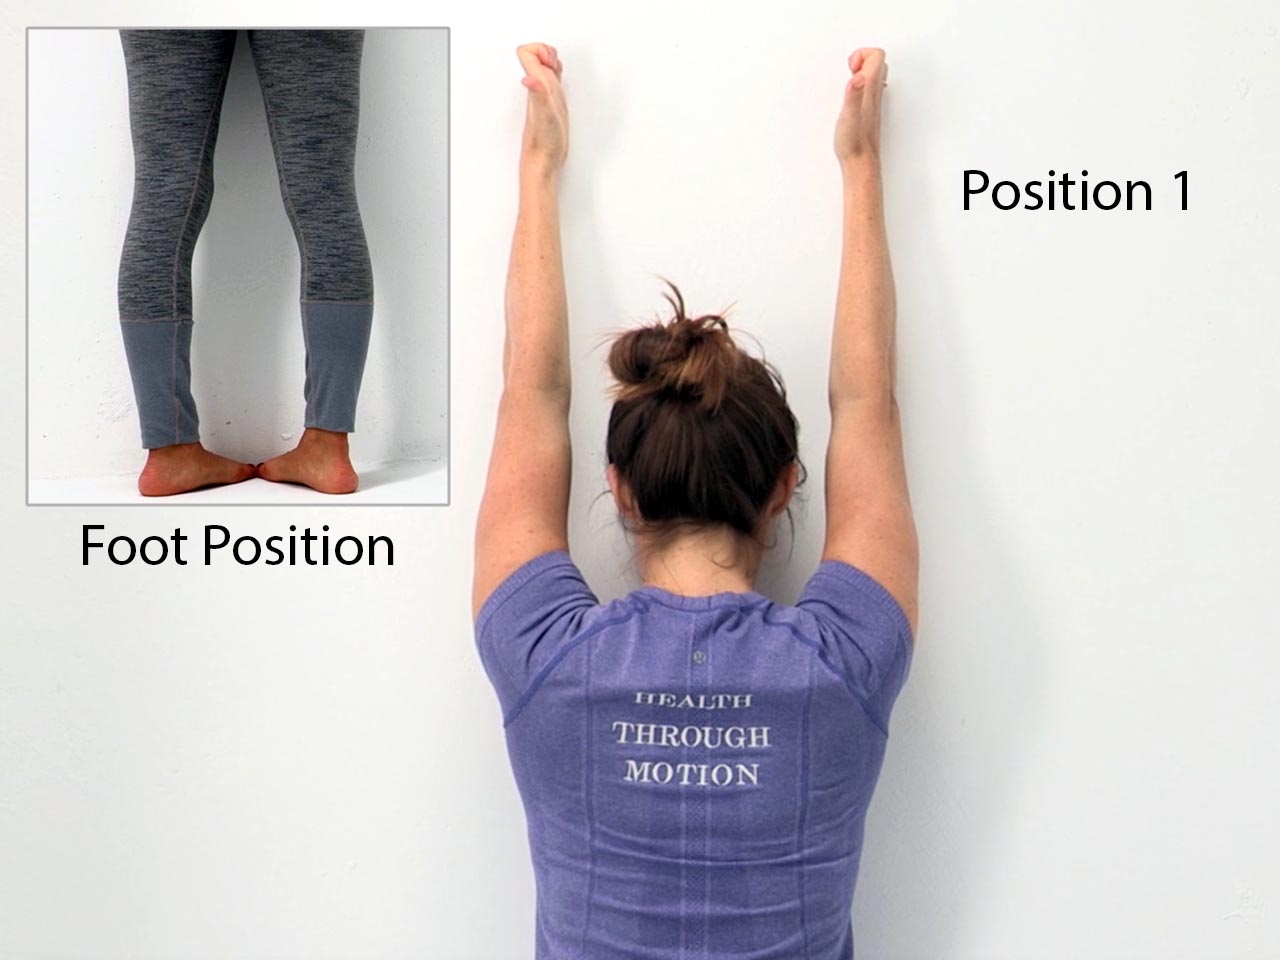
1st position - stand with feet hip width with shoulders, hips and heels touching wall (feet point straight ahead).
43
Paragraph 43 changes
Gravity Drop (3 minutes)
|

|
47
Paragraph 47 changes
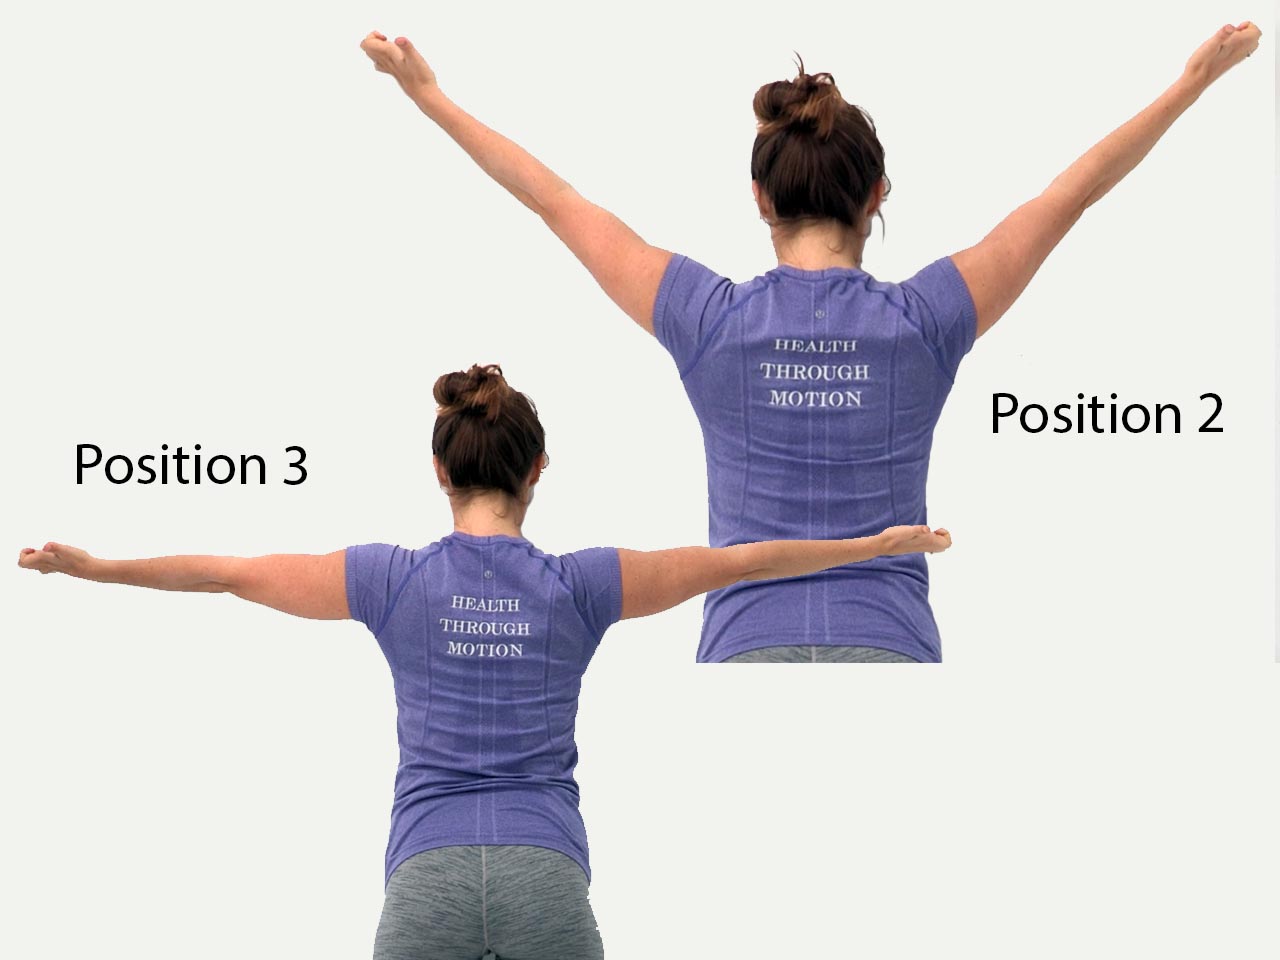
Wall Presses (10)
|
|
|
How to Perform this E-cise™
|
Added September 29, 2016 at 9:08am
by Dan Doernberg
Title: more
Standing Windmill
|
|
|
63
Paragraph 63 changes
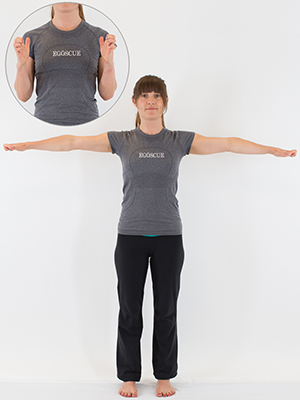
Standing Arm Circles (40)
|
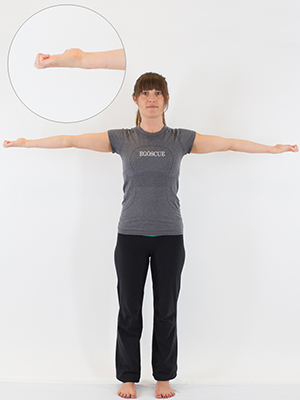
How to Perform this E-cise™
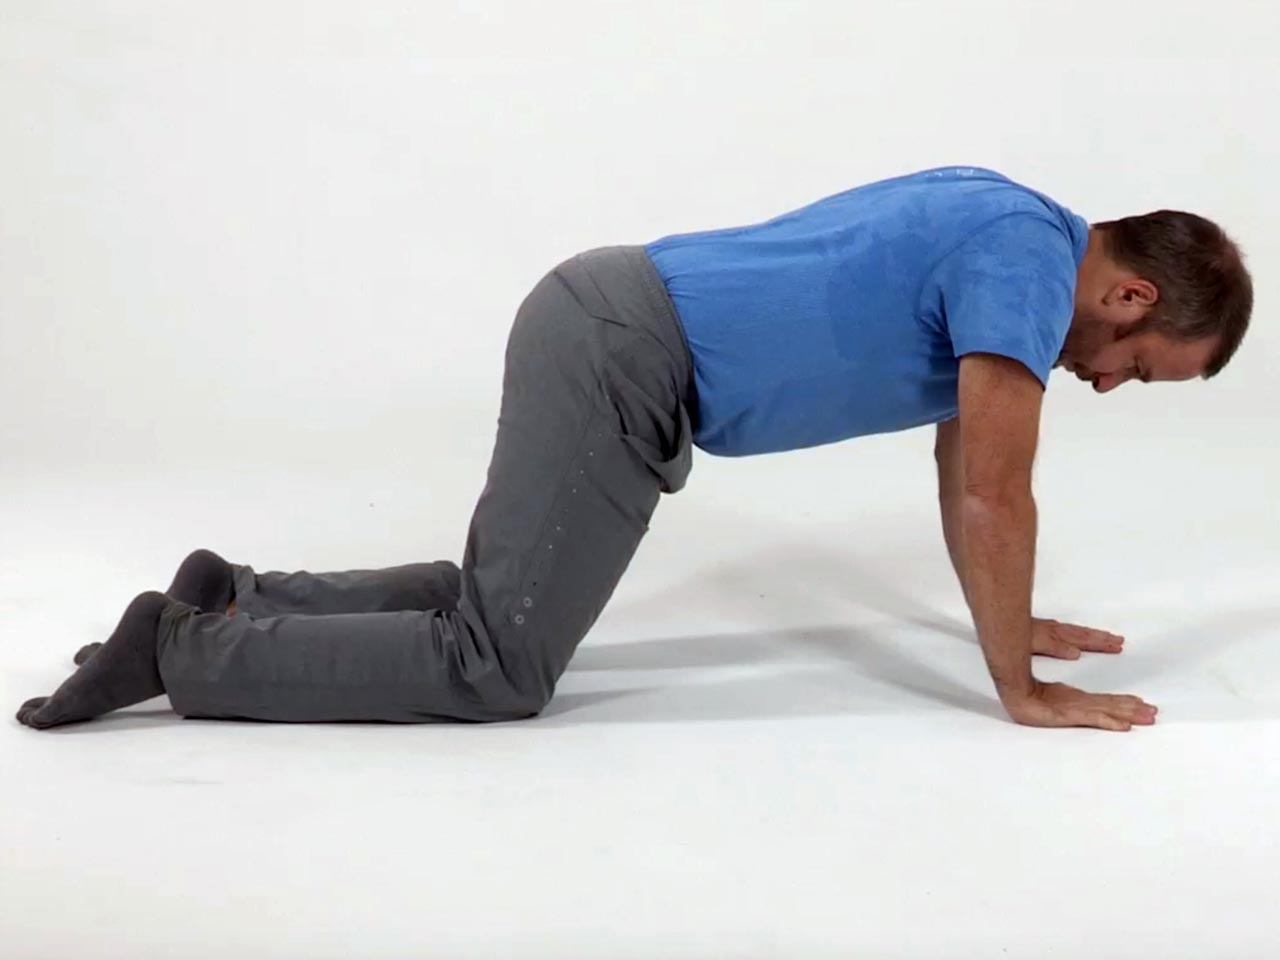
1. Stand facing mirror with your feet pointed straight ahead, hip width apart (big toes 5-6" apart). Place your finger tips into the pad of each hand and point your thumb straight out. 2. This hand position is imperative to the exercise being done correctly. It is called the "golfer's grip". 3. Squeeze your shoulder blades together backwards (no shrug up, no hip forward, no tilting back backwards) and bring your arms straight out (keep elbow locked!) to your sides at shoulder level. 4. With your palms facing downward, circle up and forward for the repetitions specified. Keep should blades pinched! With your palms facing upward, circle up and back for the desired repetitions. Go fast enough so lower back and abs have to work to keep body stable. 5. Remember to keep your feet straight and your shoulder blades squeezed together.
6. Now do it backwards (all above same except palm up and thumb points backwards).
What this E-cise™ does
This exercise promotes bilateral lumbar function through thoracic stabilization.
|
|
|
71
Paragraph 71 changes
Standing Wall Clock (1 minute)
|
|
|
How to Perform this E-cise™
|
|
|
|
91
Paragraph 91 changes
Hip Crossover Stretch - Palms Down (1 minute)
|
How to Perform this E-cise™
1. Lie on your back with both knees bent and your feet flat on the floor pointed straight ahead. 2. Place your arms out to the side at shoulder level, with your palms down and flat on the floor. Spread fingers wide. 3. Cross your left ankle over your right knee and rotate the ankle/knee junction down toward the floor. Keep the other foot stationary (aligned with him, not moving toward midline). Press your knee away from your body with your ankle. 4. Your left foot should (and right shoulder) should now be flat on the floor, along with the outside of your right leg... keep it flat. If arm can't be kept flat at 90 degree angle, try adjusting angle at first until muscles relax and then try to move back to 90. 5. Look in the opposite direction and relax your shoulders. 6. Press the left knee away from your body using the left hip muscles. 7. Hold as directed on your menu
8. Come out of it by reversing steps (e.g. keep ankle on knee until end)
9. Switch sides and repeat.
What this E-cise™ does
This e-cise promotes hip and spinal rotation with scapular engagement.
|
|
|
99
Paragraph 99 changes
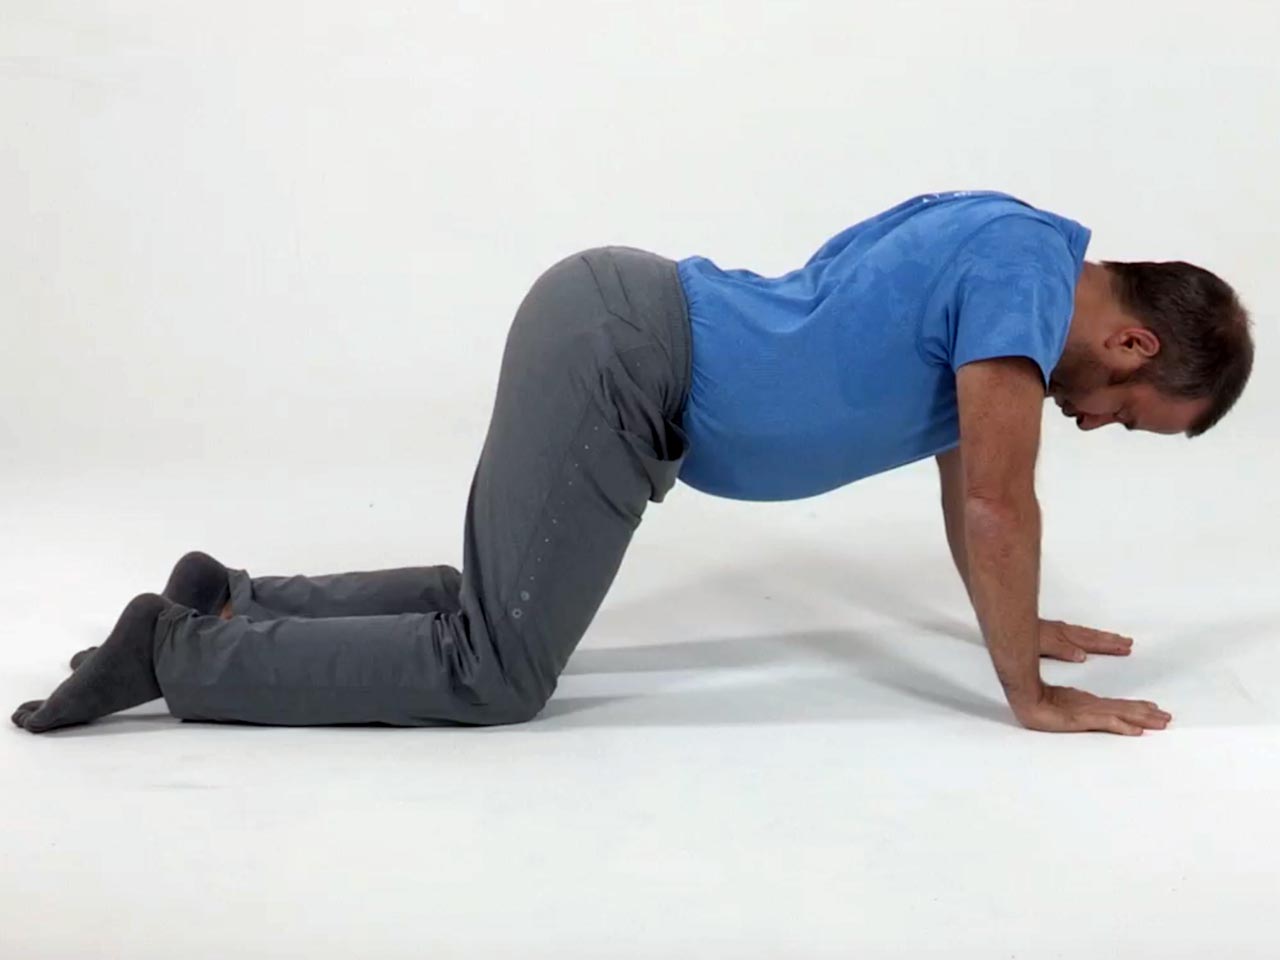
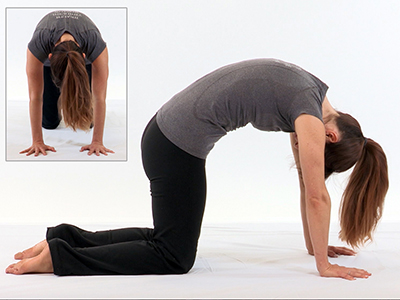
Cats & Dogs (10)
|

Added September 30, 2016 at 11:01am
by Dan Doernberg
Title: more
|
|
|
105
Paragraph 105 changes
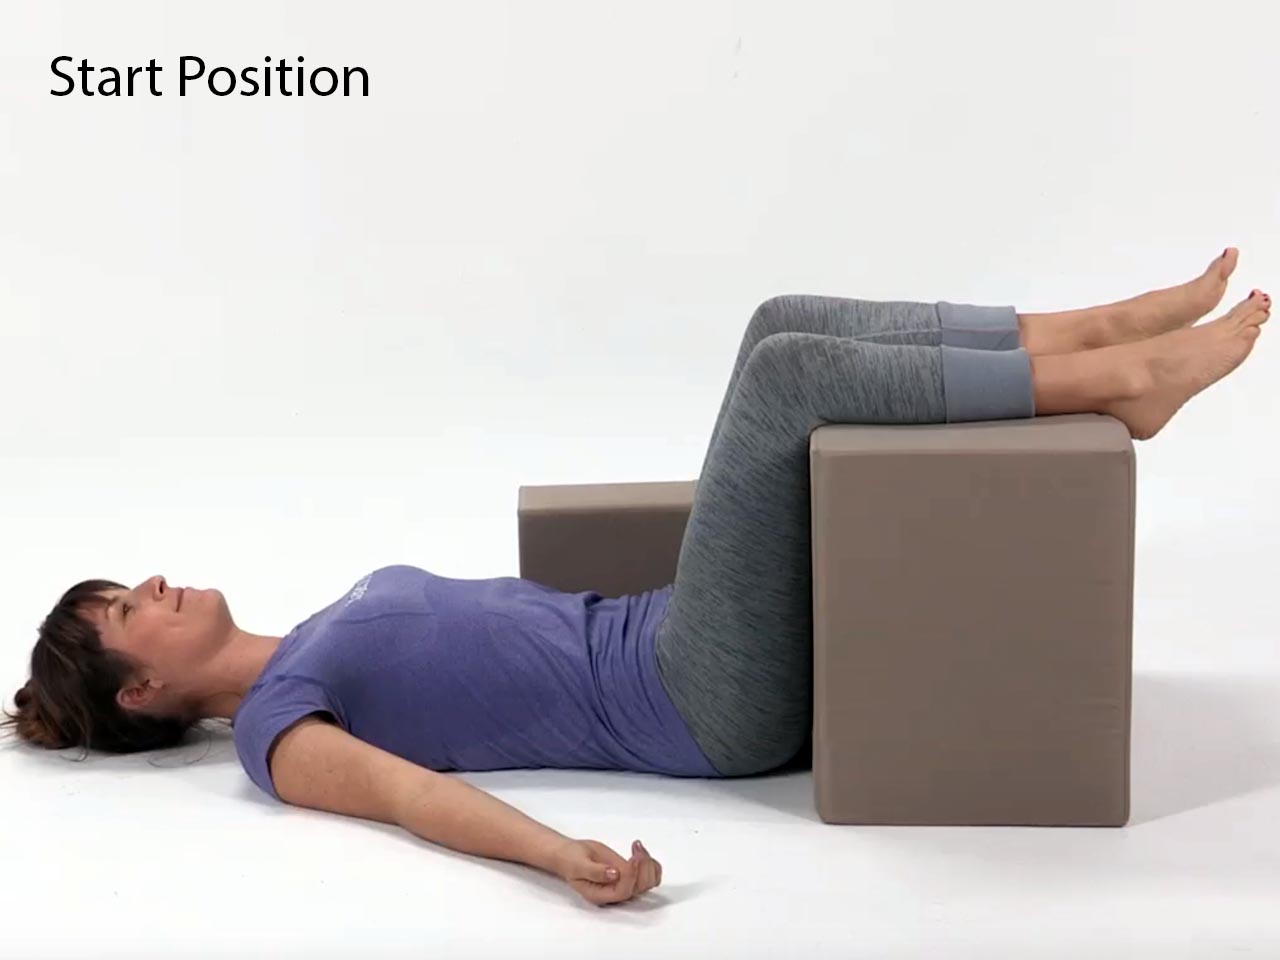
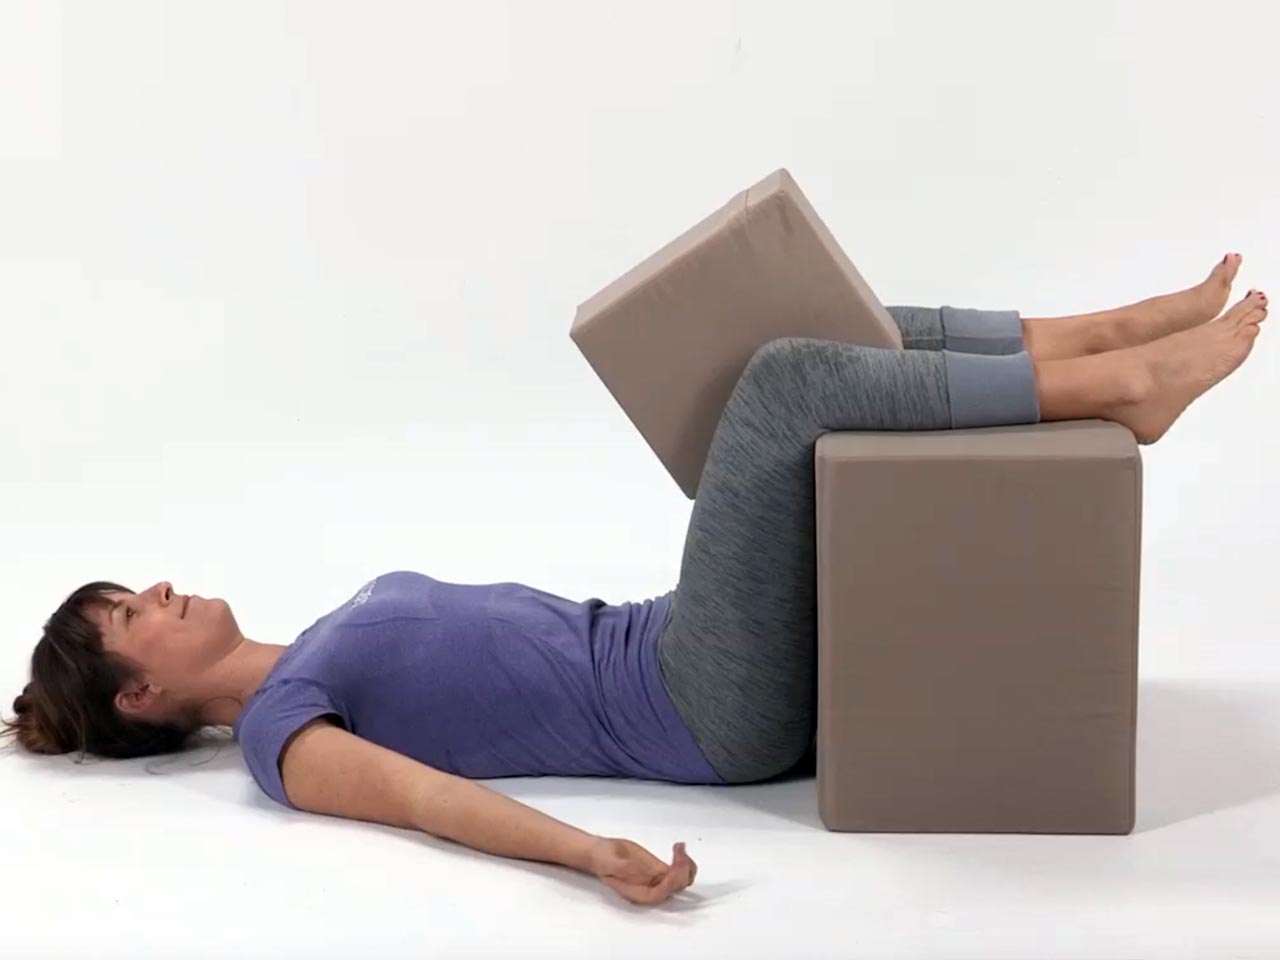
Assisted Hip Lift (1 minute)
|
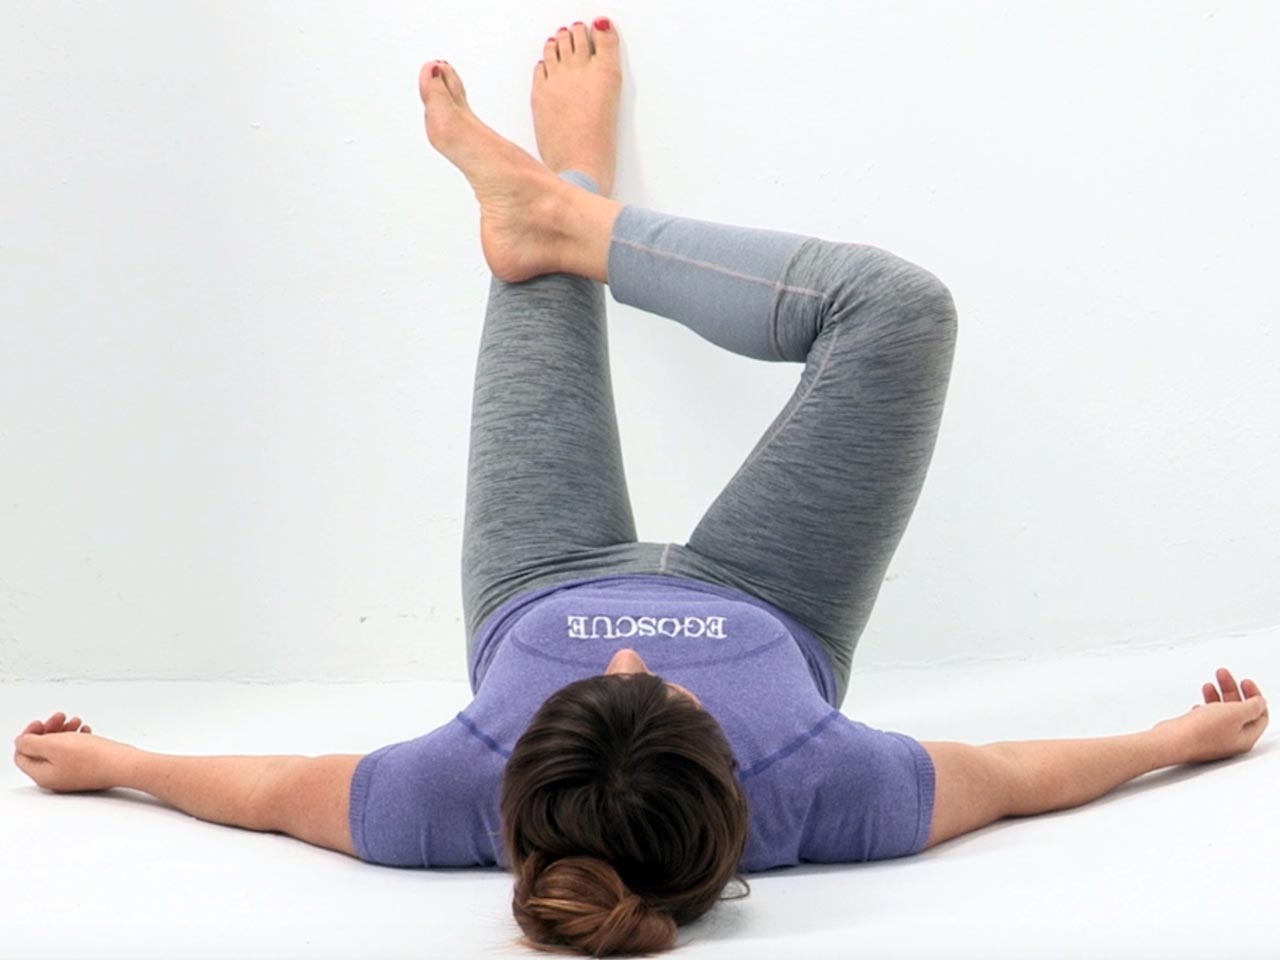
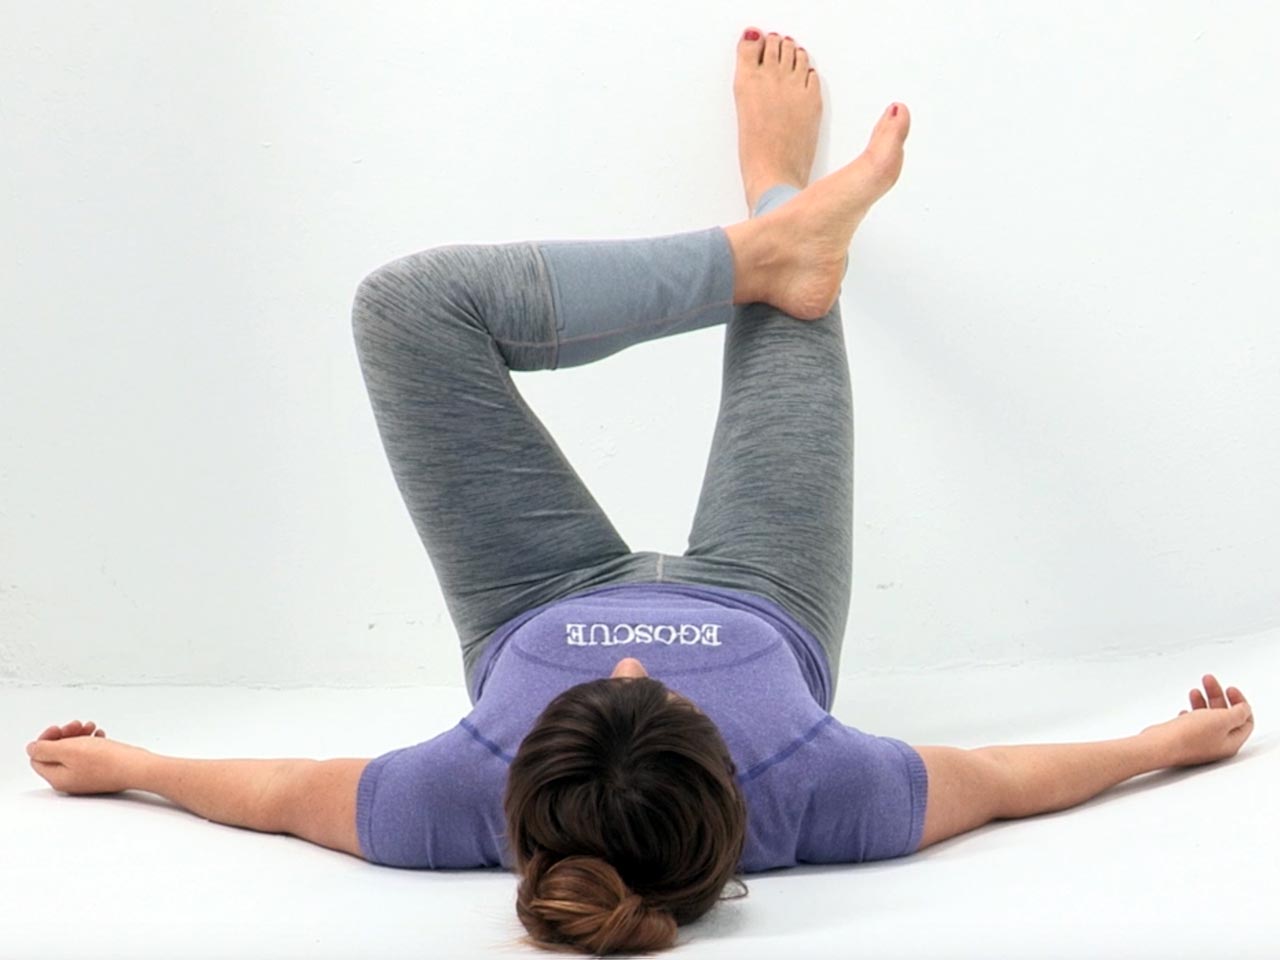
1. Lie on your back with your feet on the wall, knees bent at about a 90 degree angle. 2. Keep the feet pointing straight up, in line with your knees and hips. 3. Cross the ankle of one foot to just above the other knee. Keep your buttocks on the floor; if it lifts your butt off of the floor then scoot farther away from the wall. 4. Press the crossed leg toward the wall using your hip muscles. Do not allow your hips to shift to the side. Keep the spine in alignment. 5. Hold this position as directed on your menu. 6. Switch sides and repeat.
|
|
|
110
Paragraph 110 changes
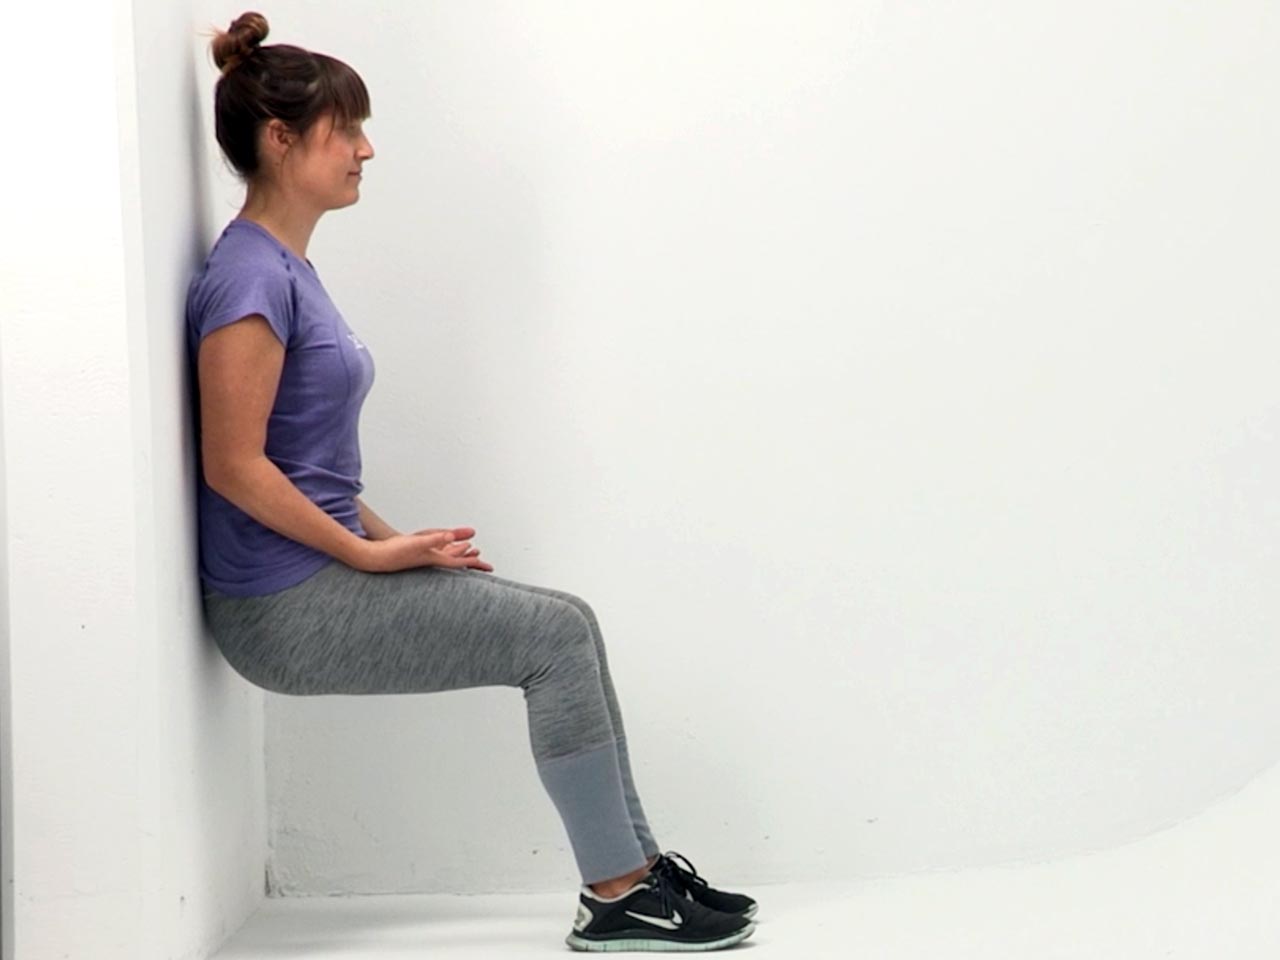
Airbench (2 minutes)
|
|
|
How to Perform this E-cise™
|
Added October 01, 2016 at 10:47am
by Dan Doernberg
Title: more
|
|
Counter Stretch (1 minute) |
- Stand facing a table or counter that is about waist high. The table/counter can be lower than your waist if you are more advanced, higher if you are just starting.
- Keep your feet pointed straight and place your hands on the table/counter you are facing.
- Walk your feet back so that your weight is in your toes. Keep the hips, knees and feet in alignment.
- Kick your buttocks/hips back to place an arch in your lower back. Keep your elbows locked out and tighten your quads.
- Hold as directed on your menu.
|
|
Static Wall (4 minutes) |
- Lie on your back with your legs pointed straight up and against the wall, upper body relaxed with arms out to sides at about 45 degrees and palms facing up feet should be hip width apart.
- When getting into this position, get your hips as close as possible to the wall, so once you are in position your butt is also as close as possible to the wall.
- If your hips are lifting off the floor then scoot your butt back until you are able to place your hips flat. As you get more functional, your hips will sit closer to the wall and be flat on the floor at the same time.
- In this position tighten your thighs and pull ALL of your toes down and back evenly towards your face.
-
 Your feet must be pointed straight (parallel) for your hips to properly do the needed work to stabilize your spine.
- Hold as directed on your menu.
Paragraph 137 changes
0 General Document comments
0 Sentence and Paragraph comments
0 Image and Video comments
I’m the head/founder of Fairness.com LLC. I really hope you l… (more)
I’m the head/founder of Fairness.com LLC. I really hope you l… (more)
1. I’ve added tips from my teacher, and from other sites
2. You can see the text descriptions while watching/listening to the video descriptions.
3. You can ask questions or suggest other explanatory additions, note similar excercises and stretches, note any caveats (e.g. if you have injuries then you may want to modify the exercises for your unique situation.
New Conversation
Hide Full Comment
I’m the head/founder of Fairness.com LLC. I really hope you l… (more)
I’m the head/founder of Fairness.com LLC. I really hope you l… (more)
New Conversation
General Document Comments 0

