Changing a Document Already Online
There are three ways to change the text of an already uploaded document:
- Adding Material to a Document — appending new material to the bottom of a document
- Editing a Sentence or Paragraph — only available to the Document Owner
- Suggesting a Revision — readers can suggest text revisions to a Sentence or Paragraph to give the Document Owner the option to accept that change, i.e. update the document, with a single click (similar to Microsoft Word's “Accept Changes”)
When the Document Owner either edits the document or accepts a Revision Suggestion, the resulting document changes are shown with Track Changes formatting (described in Section D below).
Note: in some cases a changed document will be moved to the top of reader's My Library page (with a dot) to flag that it's a revised document.
A. Adding Material to a Document
Until Winter 2016 only the Document Owner could add material to the bottom of an already uploaded document, but now others with document access can too if the Document Owner enables it (either when the document is first uploaded, or later from the Document Properties page).
There are two ways to add material:
- from your My Library page (off the “Options” menu):
- from the “More” menu while reading a document:


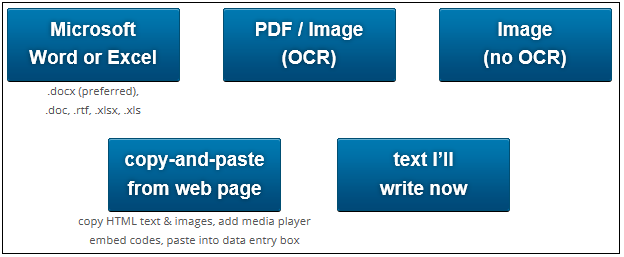
After clicking “Add to Document”, choose what kind of material to add:
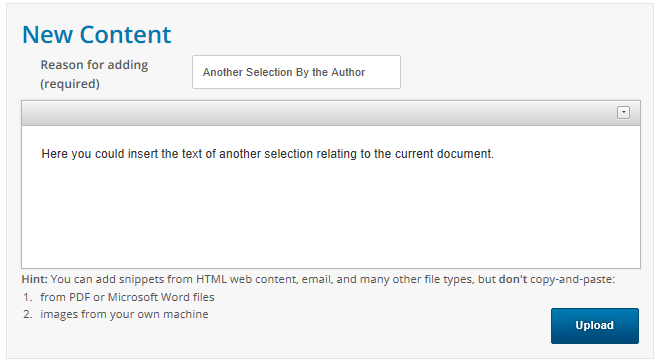
You have to provide a “Reason for adding” (it can be just a few words) as a courtesy to your readers:
Once the new content is appended, we puts a small header at the top of the Document that by default just shows how many changes were made and how recent the last change was:

but clicking on the “+” icon reveals the complete list of when and why (the “Reason for adding” field) all the new material was added:
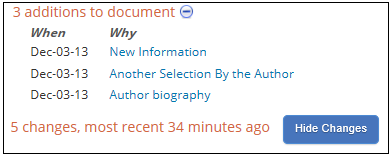
Clicking on a link in the “Why” column will take readers right to that new material, which is separated from the older document text by an orange line:

B. Editing a Sentence or Paragraph
This feature lets the Document Owner change the wording of a Sentence or Paragraph (other users with access to that document have the Revision Suggestion feature below to suggest changes). To make a change, double click any text in the Sentence or Paragraph you want to change to bring up the “Add Comment” pop-up window:
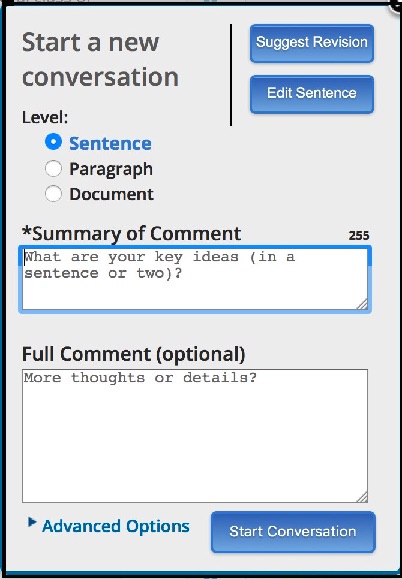
Choose a radio button for either “Sentence” or “Paragraph” and then click the blue “Edit [Sentence or Paragraph]” button; this will change the pop-up to allow editing:
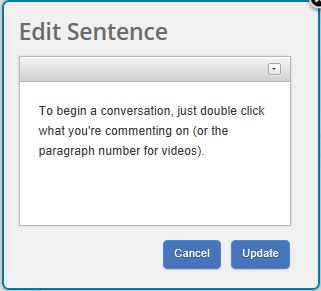
When you're finished editing, click “Update” to replace the old material with new material. How we show the old versus new wording is described in Track Changes below.
C. Suggesting a Revision
This feature lets readers suggest either Sentence or Paragraph edits to the Document Owner. Pull up the “Add Comment” window as above, but now click the “Suggest Revision” button:
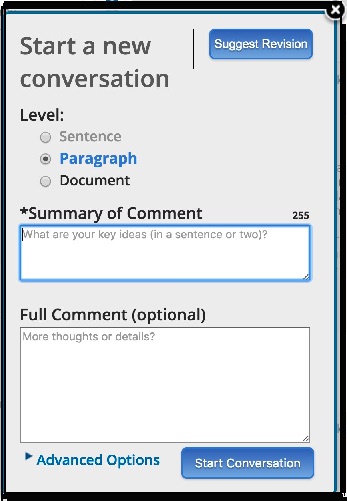
and fill in the two data entry fields (different from the screen above) that then appear:
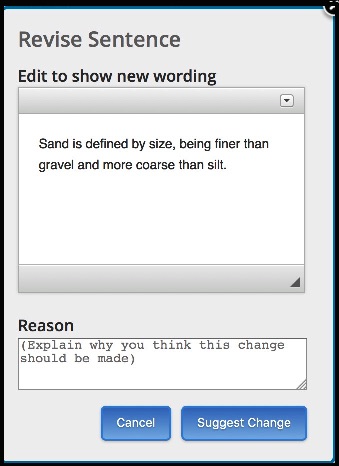
- Edit to show new (suggested) wording — the current text will appear so you can edit it
- Reason — gives you a chance (optional) to explain why you're suggesting the change
Once you've finished revising, click “Suggest Change” to add your suggestion comment (it will be automatically tagged as a “revision”).
The Document Owner can accept a “Suggest Revision” with a single click of the “Accept” button if he/she agrees that the change is an improvement:
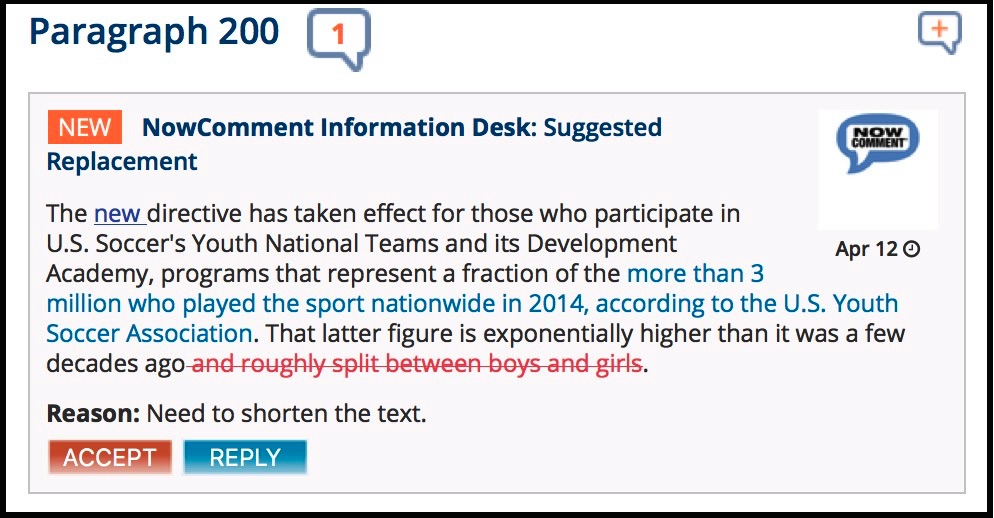
The “Accept” button changes to say “Wait” after it's clicked, as it then takes several seconds to update the document).
Whether the Document Owner accepts it or not, the Revision Suggestion remains as a comment, and the Document Owner and others can reply to it to continue a conversation about the suggested change. Accepted Revision Suggestion comments get a “revision accepted” tag.
D. Showing Changes (“Track Changes” feature)
For paragraphs that have had text changes made, either by Editing a Sentence or Paragraph or by Suggesting a Revision, you have two ways to display the document text:
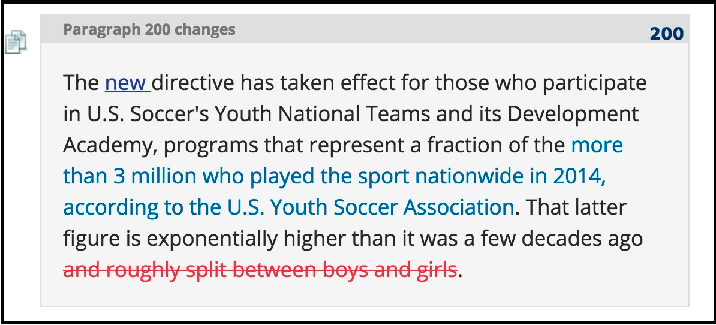
- with “Track Changes” markup: new text shown in blue and underlined, deleted material shown in red with strikethroughs, and a small gray header flagging that this paragraph has changed:
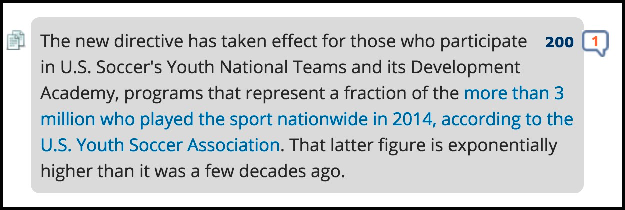
- cleanly formatted, just showing the document's current wording. This version appears whenever you click on a comment or comment header to scroll to the corresponding part of the document:
You can switch between the two views by clicking the “Track Changes” icon ![]() that appears in the left margin of the document text. Note that the Track Changes markup will always appear in the Revision Suggestion comment, whether it's been accepted or not.
that appears in the left margin of the document text. Note that the Track Changes markup will always appear in the Revision Suggestion comment, whether it's been accepted or not.
To temporarily turn on (or off) Track Changes display throughout your document click the “Show (or Hide) Changes” button at the top of the document; whether you're using the button to show or hide changes, you can always click a paragraph's Track Changes icon to change its display.

We hope these explanations will help you use these features to keep your online documents update-to-date.
Last Updated: December 1, 2016
Return to the main NowComment Help page.

